

close
Choose Your Site
Global
Social Media
Views: 0 Author: Site Editor Publish Time: 2026-10-07 Origin: Site


Unreliable water shutoffs lead to catastrophic property damage and delayed maintenance. When emergencies strike, failing plumbing fixtures compound the crisis rapidly. Replacing or installing a new control mechanism requires matching the exact specification to your existing plumbing infrastructure. A successful installation results in a leak-free, code-compliant control point. It requires zero immediate rework and holds static pressure indefinitely. We designed this guide to bridge the gap between basic DIY assumptions and professional-grade implementation. You will learn how to evaluate system criteria, execute strict connection protocols, and mitigate hidden installation risks. Proper valve installation prevents severe flooding and protects expensive interior finishes. Many homeowners underestimate the precise tolerances required for watertight plumbing seals. Whether you tackle a basic sink repair or upgrade a commercial supply line, these insights ensure your system remains secure. We outline critical evaluation criteria, reliable connection protocols, and advanced risk mitigation strategies. Proper execution guarantees your plumbing infrastructure performs flawlessly under daily pressure.
Selecting the correct valve body and connection type (pushfit, flare, compression) dictates the installation method and long-term reliability.
Pipe preparation is the highest-risk phase; burrs, ovality, or corrosion on existing copper lines will cause premature seal failure.
Adherence to manufacturing standards guarantees material performance under varying water pressures and temperatures.
Post-installation pressure testing must follow a phased approach to safely identify micro-leaks before full system restoration.
Choosing the correct shutoff mechanism involves more than grabbing the first option off a hardware shelf. Standardized manufacturing matters immensely in professional environments. Material quality dictates how well a fixture handles thermal expansion and continuous hydrostatic pressure. For instance, using a BS EN 1213 Brass Stop Valve ensures compliance with stringent European standards. It guarantees specific acoustic ratings and reliable flow rate performances for copper alloy fixtures. This compliance protects building occupants from excessive plumbing noise and ensures steady water delivery.
Connection frameworks vary based on your desired project outcomes. You must align the fitting style with the operational environment. If you balance installation speed against permanence, a Pushfit Bronze Stopcock offers rapid, tool-free deployment. This design proves ideal for emergency repairs or incredibly tight access areas inside cabinets. However, you must ensure the pipe exterior remains entirely flawless. Any surface scratches will disrupt the internal O-ring seal.
Conversely, high-pressure or heavy-vibration environments demand highly robust mechanical joints. A Flare Copper Tube Stop Valve creates a connection highly resistant to mechanical pull-out forces. Professionals heavily favor these flared configurations in heavy industrial setups or high-end residential applications where failure is not an option.
You also need to assess specific spatial constraints before buying parts. Determine your configuration logic based on plumbing rough-ins. Angle stops exit the wall directly behind fixtures. Straight stops exit the floor or protrude straight up from a cabinet base. Always map out your physical accessibility needs. You want users to reach the shutoff handle easily during future water emergencies.
Connection Type | Primary Advantage | Best Application Scenario | Critical Requirement |
|---|---|---|---|
Pushfit | Speed and tool-free assembly | Emergency repairs, tight spaces | Flawless, scratch-free pipe exterior |
Flare | Vibration and pull-out resistance | Industrial, high-pressure lines | Precise 45-degree flaring tool |
Compression | Reliable mechanical seal | Standard residential plumbing | Proper torque without overtightening |
Sweat (Soldered) | Permanent, seamless integration | In-wall concealed plumbing | Strict heat control to protect seals |
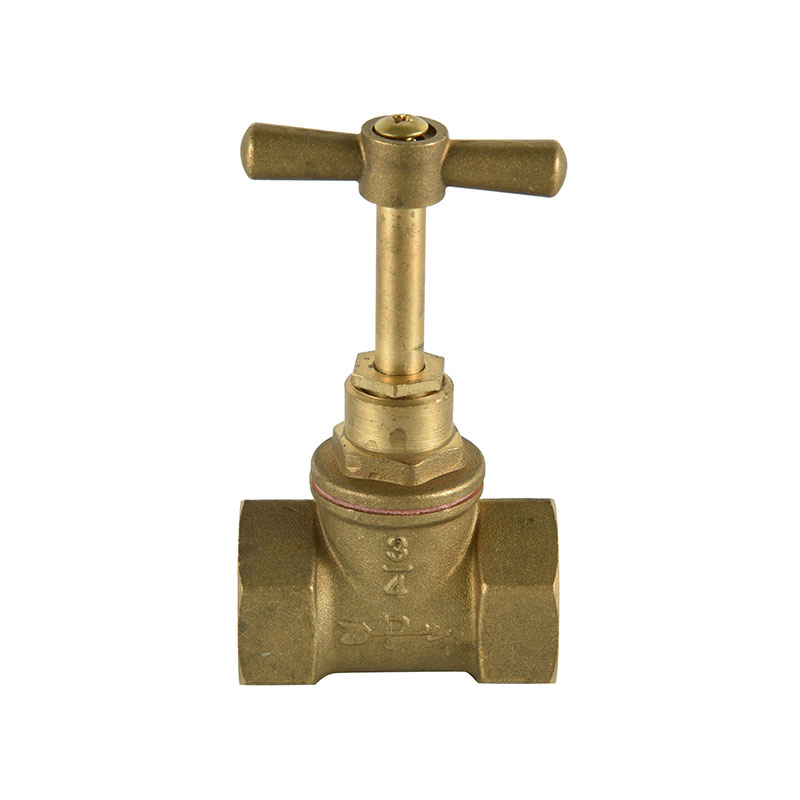
Thorough preparation separates successful plumbing installations from expensive disasters. System isolation serves as your primary defense against sudden flooding. You must locate and secure the primary water main before attempting any repair. Verify complete depressurization immediately. Turning off the main dial is only step one. Open a lower-level faucet to drain residual line pressure. This drains the vertical water column trapped inside your home plumbing stack.
Conduct a meticulous pipe condition audit next. Assess the structural integrity of the copper or PEX stub-out. Implementation realities often complicate the process. Hard water scaling ruins new seals instantly. Existing solder lumps from previous repairs create uneven mating surfaces. Out-of-round pipes compromise pushfit and compression seals severely. You must inspect the line carefully using adequate lighting. Use fine emery cloth to polish raw copper surfaces until they shine. Remove all paint, oxidation, and drywall mud residue.
Tooling and material readiness define your workflow efficiency. Define your specific toolkit based on the exact valve selected. Gather specialized equipment ahead of time. Use precision flaring tools for flare valves. Procure dedicated internal and external deburring tools. Gather smooth-jaw adjustable wrenches and sharp rotary pipe cutters. Never rely on worn or rusty tools.
We must address a highly transparent assumption here. Many DIY enthusiasts attempt to use generic slip-joint pliers instead of properly sized wrenches. They substitute gripping tools for turning tools. This inevitably damages delicate brass finishes. Worse, generic pliers distort compression nuts out of round. A distorted nut will never thread properly onto a stop valve. Always use two smooth adjustable wrenches to protect the integrity of the brass components.
Cutting the pipe squarely remains the most critical physical step. A perfectly square cut allows fittings to seat flush against internal stops. You must remove old compression rings or deeply scored pipe sections. Provide a pristine slate for the new fitting.
Follow these standardized preparation steps:
Measure the required cutback distance carefully. Leave enough pipe length for future repairs.
Position the rotary pipe cutter exactly on your mark.
Rotate the cutter slowly around the pipe circumference.
Apply gradual tension after each full rotation to avoid crushing the soft copper wall.
Ream the inside edge of the freshly cut pipe thoroughly.
Deburr the outside edge until it feels entirely smooth to the touch.
Reaming the inside and deburring the outside prevents turbulent water flow. Burrs cause water to spin and erode the copper pipe from the inside over time. More importantly, deburring protects delicate internal O-rings from sharp metallic edges. A single metal sliver can slice an O-ring, causing an immediate, hidden leak behind your cabinetry.
Bottom out the pipe completely into the valve body. You must push the pipe inward until you feel a hard, physical stop. This action ensures proper seating depth. A shallow seat causes catastrophic blowouts under full municipal pressure. Mark the pipe with a permanent marker if you need visual confirmation of the depth.
Maintain correct orientation for the shutoff handle during placement. We refer to this as accessibility mapping. You want users to reach the handle effortlessly during future emergencies. Point the handle outward or slightly upward. Avoid pinning the handle against the wall or burying it behind fixed cabinet partitions. Test the handle rotation fully before securing the final connection.
Compression and threaded methods require intentional, measured force. Always hand-thread the nut initially. This manual technique prevents cross-threading the soft brass threads. Spin the nut clockwise using only your fingers until it meets noticeable resistance. If it binds immediately, back it off and realign it.
Follow hand-threading with precise torque application. Use the industry-standard two-wrench method. Hold the valve body entirely stationary using one wrench. Turn the compression nut smoothly using the second wrench. This isolates the turning force. It prevents the supply pipe from twisting inside the wall cavity. Twisted pipes often crack unseen behind drywall, leading to slow, devastating mold growth.
Different connection frameworks require unique handling procedures. Pushfit deployment demands extreme precision regarding pipe condition. Mark your exact insertion depth prior to pushing the fitting onto the pipe. Consult the manufacturer guidelines for the specific depth measurement. Push the fitting firmly until the pipe edge reaches your mark. We must highlight the severe risk of rolled O-rings. If the pipe edge remains sharp or jagged, it will push the rubber O-ring out of its seating groove. A displaced O-ring provides zero sealing capability.
Flare joint assembly relies entirely on mechanical geometry. You must produce a precise 45-degree flare using a calibrated flaring block and cone. Clean the pipe end thoroughly before flaring. Drive the cone into the soft copper steadily. Inspect the resulting flare for micro-cracks along the rim. If you spot a crack, cut the pipe and start over. We emphasize one major rule here. Thread sealant, pipe dope, or Teflon tape remains strictly unnecessary on flare mating surfaces. In fact, applying tape proves highly counterproductive. It prevents the brass-to-brass mechanical interface from seating properly, practically guaranteeing a leak.
Sweat (soldered) valves require rigorous heat control considerations. Professional plumbers recognize the danger of melting internal components. You must remove internal stems, handles, and rubber washers entirely. Do this before you apply the torch flame to the brass body. If you leave them inside, the high heat melts the seals instantly, ruining the unit. Apply water-soluble flux sparingly. Direct the torch flame away from the wall structure. Heat the thicker fitting body evenly rather than the thin pipe. This draws the lead-free solder deep into the capillary space for a permanent joint.
Never rush the final testing phase. Phased repressurization protects your new plumbing joints. Gradually open the main water line valve. Introduce static pressure slowly into the drained system. This slow release minimizes water hammer shock. Sudden pressure spikes create hydraulic shockwaves. These shockwaves often dislodge poorly seated pushfit or compression fittings. Allow air to escape through the open lower-level faucet while the system fills.
Micro-leak detection requires patience. Combine visual inspection with tactile checks. Water often leaks so slowly it goes unnoticed by the naked eye. Use the tissue paper method for verification. Wrap dry, white tissue paper around the newly secured joint. Wait for a minimum 15-minute observation window. Check the paper under strong lighting. If the tissue dampens or shows water spots, a micro-leak exists. You must address it immediately before closing any walls.
Troubleshooting failures involves calculated adjustments. Take actionable steps if weeping occurs on a compression joint. Apply fractional quarter-turns to the compression nut using your two wrenches. Wipe it dry and test again. Do not overtighten immediately. Maximum torque does not equal maximum sealing power.
You must know when to abandon a failed joint entirely. Over-tightened brass components deform permanently. A distorted ferrule cannot compress any further. If a joint continues to weep after reasonable tightening, stop. Cut the pipe back to fresh copper. Replace the deformed parts rather than risking a total blowout while you sleep. Professional installation demands knowing when to start over.
Base your final purchase decision on specific site constraints and your personal tooling capability. Consider the specific pipe material emerging from your wall, whether copper, PEX, or CPVC. Ensure your chosen hardware matches the pipe type flawlessly. Always review local building compliance requirements to avoid code violations during property inspections. Reliable shutoffs form the backbone of safe residential and commercial plumbing networks.
Your next step requires immediate action. Audit your installation environment thoroughly. Measure the pipe outer diameter accurately using digital calipers. Procure the corresponding high-quality valve and necessary backup sealing materials. Invest time in preparing the pipe surface properly. Proper preparation, combined with the correct fitting choice, guarantees long-term plumbing success and protects your property from severe water damage.
A: A stopcock typically controls water flow inline along a main supply pipe. We often use them for exterior distribution or main branch shutoffs. An angle stop valve serves terminal fixture applications. It sits exactly where water exits the wall, turning the flow 90 degrees upward to supply a sink, toilet, or dishwasher.
A: We strongly advise against reusing these specific components. A brass ferrule compresses and permanently deforms onto the copper pipe during the initial installation. Reusing deformed brass severely risks micro-leaks or sudden joint blowouts. Always cut the pipe back slightly and install a completely new nut and ferrule.
A: Rotation is entirely normal for push-to-connect fittings. The internal stainless-steel grab ring secures the pipe against outward pull-out forces. Meanwhile, the internal O-ring maintains the watertight seal independent of rotational movement. Spinning the installed valve will not break the seal or indicate a pressure leak.
A: No. Applying Teflon tape to compression threads represents a major technical misconception. The actual watertight seal forms internally when the brass ferrule compresses between the pipe and the valve body. The exterior threads merely provide the mechanical pulling force. Tape interferes with proper tightening.


