

close
Choose Your Site
Global
Social Media
Views: 0 Author: Site Editor Publish Time: 2026-08-31 Origin: Site


The depth of your water meter box must fit your water meter and valve setup. You need extensions if the meter is below the frost line or needs to be reached from above. A wrong size can freeze the meter, break codes, and cost a lot to fix. This guide explains depth, extensions, and risers in a clear way. You will learn to measure your pit, choose extensions, and install risers the right way.
You can pick from many models. The Ductile Iron Water Meter Box with Plastic Lid is strong. The Plastic Water Meter Box with Locking Lid gives more security. The Cast Iron Water Meter Box lasts a long time. The Cast Iron and Plastic Water Meter Box gives you both good points. The Plastic Water Meter Box is light. Each design guards the water meter and helps it read correctly.
Measure your water meter pit carefully. Include the widest and tallest parts.
Check your local frost line. Choose a box deep enough to protect your meter.
Add extension rings if your box is too shallow. Seal all joints to keep water out.
Use a riser to lift the meter above ground. This meets code and makes reading easy.
Avoid common mistakes. Measure the full assembly and give valves enough space.
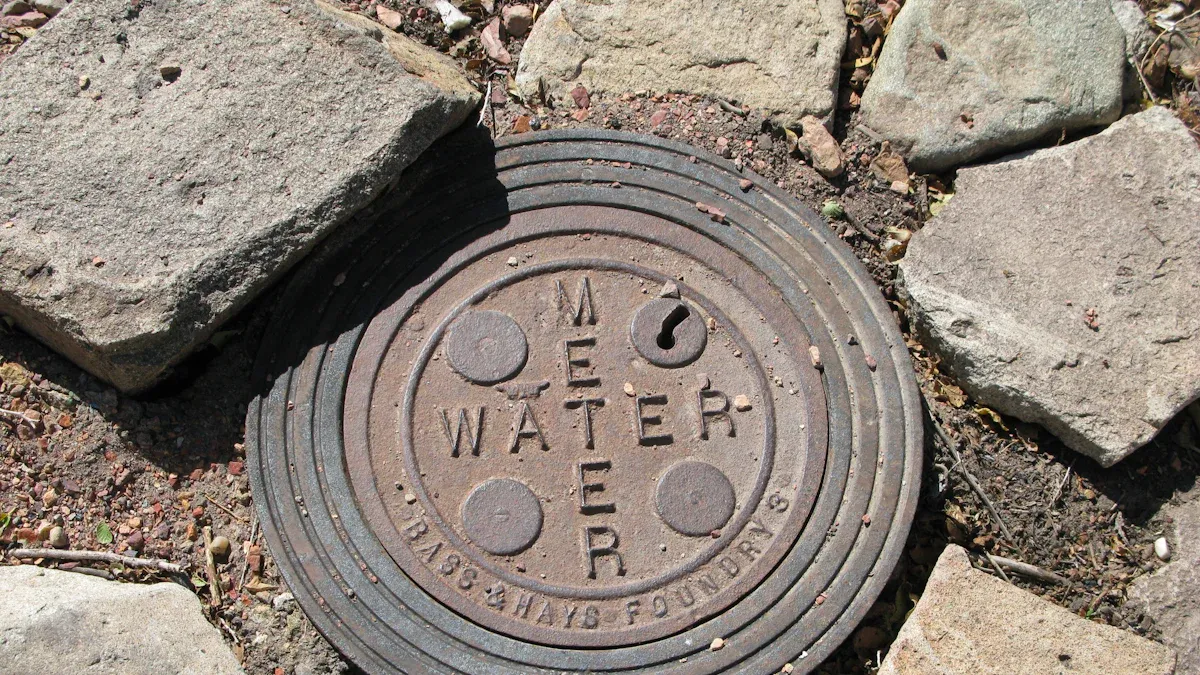
Depth is the first thing to get right. A box that sits too high leaves the meter exposed to cold air. A box that sits too low wastes money and may not meet code. You need to match the box depth to your frost line and to the physical space your meter and valves require.
The frost line is the depth at which groundwater freezes in winter. This depth changes by region. In Arkansas and the Mid-South, standard-depth boxes work well because frost lines are shallower than in the Midwest. Northern Arkansas may still see hard freezes, so you should check local data. In Missouri, Illinois, and Kansas, the standard freezing line reaches 36 inches. Northern Missouri and central Illinois may require even deeper boxes. Your water meter box must extend below the frost line. If the meter sits above it, freezing water can crack the meter body and damage fittings. You can review regional frost depth data in the table below.
Region | Standard Depth / Frost Line |
|---|---|
Arkansas and the Mid-South | Standard-depth boxes are sufficient; frost lines are shallower than the Midwest (northern Arkansas may still experience hard freezes) |
Missouri, Illinois, Kansas (Midwest) | Standard freezing line is 36 inches |
Northern Missouri and central Illinois | May require deeper depths than the standard 36 inches |
Residential boxes come in many depths. Common options include 14, 18, and 24 inches. Raising's Ductile Iron and Plastic models come in these depths and deeper. You can choose from 14, 18, 24, 30, 36, 42, 48, 54, and 60 inches. Each model has an 18-inch diameter. The chart below shows how these depths compare.
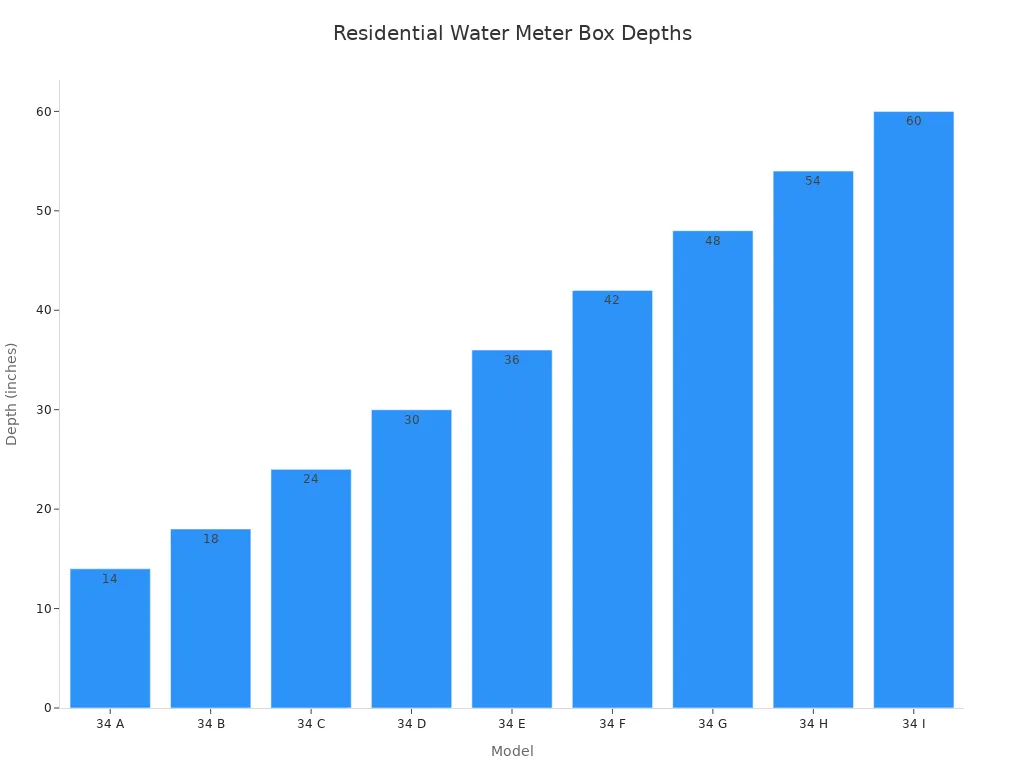
Model | Depth (in) | Diameter (in) |
|---|---|---|
34 A | 14 | 18 |
34 B | 18 | 18 |
34 C | 24 | 18 |
34 D | 30 | 18 |
34 E | 36 | 18 |
34 F | 42 | 18 |
34 G | 48 | 18 |
34 H | 54 | 18 |
34 I | 60 | 18 |
Depth must accommodate the meter and all below-ground fittings. The meter body is only one part. You also have parallel fittings, a curb stop, and shut-off valves. These parts add height and width. If you choose a box based only on the meter body, the lid may not close. The valve handle may hit the cover. Measure the full assembly before you pick a size. A box that is too shallow forces you to cut pipes or leave the lid open. Both choices create problems. A box that is too deep costs more and may need extra backfill. Match the depth to your frost line and your assembly. This step protects your water meter from freezing and keeps your system code-compliant.
Before you select a water meter box, you must measure your water meter pit. This step ensures the box fits your entire assembly. You avoid buying a box that is too small or too large. Two measurements matter most: the width across the widest part of the assembly and the total vertical height from the lowest pipe to the highest fitting. Get these numbers right. The wrong measurement forces you to cut pipes or leave the lid open. Both options cause problems later.
Start by finding the widest point of your water meter assembly. This point includes the meter body itself plus any parallel fittings, elbows, or the curb stop handle. The curb stop handle often sticks out sideways. You must include it in your measurement. Do not measure only the meter body. That mistake leads to a box that cannot close. Use a tape measure to find the distance from the leftmost part to the rightmost part. Write down that number.
Next, measure the vertical height. Start from the bottom of the lowest pipe or fitting. Measure up to the top of the highest valve or cap. This vertical measurement tells you the minimum depth your box must accommodate. Do not forget the handle of the shut-off valve. If the handle sticks up, you must include its height. The handle adds extra vertical space.
For a horizontal water meter, the fittings on the inlet and outlet sides often add width. The body may be narrow. But the couplings and valves extend beyond it. Measure across these extensions. For a vertical water meter, the height of the assembly becomes important. The meter stands upright. The top and bottom fittings add to the vertical dimension. Capture both the width and the height. Write down both numbers. You need them for the next step.
Raising's boxes are sized to fit standard assemblies. But every installation is different. Your assembly may have unique parts. The curb stop handle may be larger than normal. The pipe layout may include extra bends. Measure your specific setup. Do not rely on generic sizes. Your water meter pit needs a box that matches its actual dimensions.
After you get the widest measurement, add 2 inches of clearance on each side. This extra space allows you to install the box without binding. It also lets you reach inside for maintenance. The formula is simple: widest assembly width plus 4 inches equals minimum box width. For example, if your assembly measures 14 inches wide, you need a box at least 18 inches wide. This width matches the standard 18-inch diameter of Raising's boxes.
Apply the same logic to vertical clearance. Add 2 inches below the lowest point and 2 inches above the highest point. The total depth equals assembly height plus 4 inches. For example, if your assembly height is 20 inches, you need a box at least 24 inches deep. This calculation ensures the lid closes properly. It also keeps the meter accessible for reading and repairs.
Now check the standard depths from the previous section. Raising's boxes come in 14, 18, 24, 30, 36, 42, 48, 54, and 60 inches. If your depth requirement falls between two standard sizes, choose the next larger size. Do not squeeze the assembly into a box that is too shallow. That risks damage to the meter and makes access difficult. For example, if your assembly height plus clearance equals 20 inches, pick a box with 24-inch depth. If it equals 28 inches, pick a 30-inch depth. Going up one size costs little but saves you from future problems.
The same rule applies if your width measurement is close to 18 inches. The standard diameter covers most assemblies. But if your assembly with clearance exceeds 18 inches, you need a larger box. Contact Raising for custom options. Most residential assemblies fit within the standard diameter. Commercial setups may require more space. Measure first. Then choose.
Taking the time to measure your water meter pit correctly prevents costly rework. You get a box that fits. Your meter stays protected. Your installation meets code. This one step ensures success.
You need extension rings when your standard box depth falls short. This happens in two common cases. First, your water meter sits deeper in the ground than your box can reach. Second, your local frost line runs deeper than your box depth allows. Both situations leave your meter exposed to freezing temperatures. Extension rings solve this problem by adding height to your existing box.
Raising offers compatible extension rings for their models, including the NR-W010 and NR-W011. These rings match the diameter and locking mechanisms of your box. You simply stack them on top of the base unit. Each ring adds several inches of depth. This modular approach lets you customize your water meter box to match your specific site conditions. You avoid buying a completely new box when a simple extension will work.
Proper installation practices matter when you add extension rings. Start by cleaning the top rim of your existing box. Remove dirt, debris, or old sealant. Place the extension ring on top. Align the bolt holes or locking tabs. Fasten the ring securely with the provided hardware. Do not skip this step. A loose ring lets water seep into the box. That moisture can freeze and crack your meter.
You must maintain waterproofing at every joint. Apply a bead of silicone sealant between the box and the extension ring. Smooth the sealant with your finger or a tool. This creates a watertight barrier. Check your local installation requirements for any additional sealing rules. Some codes require specific gasket materials. Others mandate a certain number of fasteners. Follow these rules exactly. A properly sealed extension keeps your water meter dry and protected. It also keeps your system code-compliant. When you finish, test the lid fit. The cover should sit flush and lock without force.
Risers lift your water meter so it can be read and serviced above ground. They are not the same as extension rings. Extension rings make your box deeper. Risers raise the meter itself. You need a riser when local codes say the meter must be above ground. You also need one so you can reach it without kneeling.
City codes often say meters must be easy to reach. Outdoor setups need the water meter behind a curb stop in a locked enclosure above ground. You must also add a backflow preventer and pressure reducing valve. Indoor setups need the meter at least 12 inches above the finished floor. For below-grade structures, the top must sit at least 12 inches above grade. A riser helps you meet all these rules.
Risers do not change how deep your trench is. They change how high the meter sits in that trench. You still need a box deep enough to reach the frost line. The riser puts the meter at the right height for reading. This split of jobs lets you fix two problems on their own. Pick a box that matches your frost depth. Then add a riser to meet your access code.
Check your local code before you pick a riser. The exact height is different in each area. Many codes call for at least 12 inches above grade. Others say the meter must be visible while standing. Follow the stricter rule. A riser that is too short fails inspection. A riser that is too tall may block access to other parts.
Raising's water meter boxes work with standard riser kits. Attach the riser without changing the lid or cover. Some setups may need a different lid for the vertical rise. Measure from the top of the box to the meter after installation. Make sure the lid still closes and locks. Test the fit before you backfill the trench. A few extra minutes of checking saves you from rework later.
Two errors cause most water meter box failures. Both come from measuring only part of the setup. Each mistake leads to freeze damage, code violations, or a lid that will not close.
Many installers pick a box depth based on the meter size alone. They measure the meter body and order a box that fits it. This approach ignores the frost line. A box that sits above the frost line leaves the water meter exposed to freezing ground. Water expands when it freezes. That expansion can crack the meter body and split fittings. You then face a costly repair in the middle of winter.
The fix is simple. Check your regional frost depth first. In Missouri, Illinois, and Kansas, the standard freezing line reaches 36 inches. Northern areas may run deeper. Your box must extend below that line. Raising's boxes come in depths from 14 to 60 inches, so you can match almost any frost depth. Choose the depth that clears the frost line, not just the depth that fits the meter. A box that is one size deeper costs little more and protects your system for years.
The shut-off valve is the second common oversight. This valve sits beside or below the meter. Its handle sticks out sideways or upward. If you measure only the meter body, the box may be too narrow or too shallow. The lid then hits the handle and will not close. Or the valve sits buried under the box rim, and you cannot reach it in an emergency. A stuck valve turns a small leak into a flooded yard.
Measure the full assembly, including the valve and its handle. Add 2 inches of clearance on each side. This step ensures the lid closes flush and the valve stays accessible. A box that traps the shut-off valve fails inspection and slows every repair. Give the valve the space it needs. Check the handle height and width before you order. A few minutes with a tape measure now saves hours of digging later.
You have learned three key steps. First, measure your water meter pit and check your local frost depth. The code requires pipes 12 inches below the maximum frost depth and the cover 12 inches below grade. Second, add extension rings if the box is too shallow. Third, use a riser when code demands above-ground access. The meter must be at least 12 inches above the finished floor, and the top of the structure 12 inches above grade.
Use this checklist: check the frost line, measure assembly width plus 2 inches, verify local code, and choose a box from Raising’s range. Verify your local plumbing code now and use our measurements to select the right one.
Your box must extend below your local frost line. In Missouri, Illinois, and Kansas, that line reaches 36 inches. Northern areas may run deeper. Choose a box depth that clears the frost line and fits your full assembly with clearance.
Yes. Extension rings add height when your standard box falls short. Raising offers compatible rings for models like the NR-W010 and NR-W011. Fasten each ring securely and seal every joint to maintain waterproofing.
An extension makes your box deeper. A riser lifts the water meter to an above-ground height for reading and service. You may need both. The extension handles frost depth. The riser meets accessibility codes.
Measure the widest point of your assembly, including the curb stop handle. Add 2 inches of clearance on each side. Measure the vertical height from the lowest pipe to the highest fitting. Add 4 inches total. Choose the next larger standard size if needed.
A box that sits above the frost line can freeze and crack your meter. A box that is too narrow traps the shut-off valve. The lid will not close. You then face costly repairs and code violations.


